New project
Initiating a project
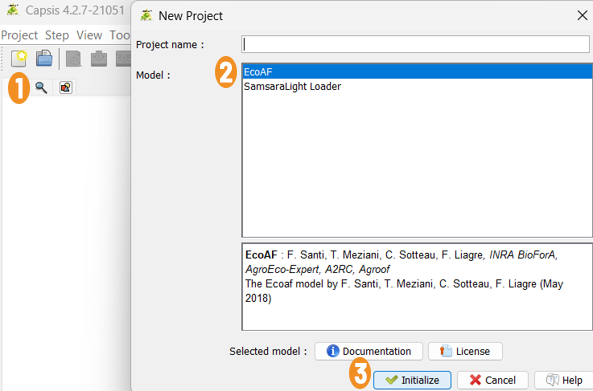
1 Click on the first icon.
2 In the New Project window, select EcoAF in Model.
3 Click on Initialize
Choose files
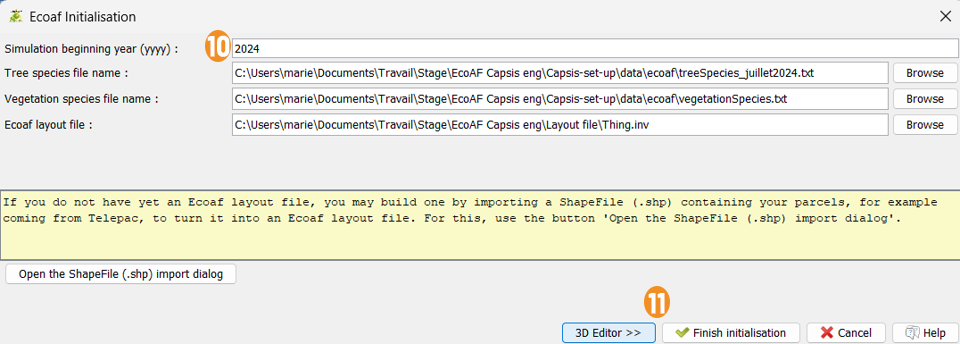
1 Find files here > Installeur-ecoaf > data > ecoaf > treeSpecies et vegetationSpecies
2 In Ecoaf layout file, select an existing file
3 Click on the button Open the ShapeFile(.shp) import dialog to import .shp (= a file of parcels)
Info
CAPSIS often automatically recognises the expected treeSpecies, vegetationSpecies, .shp and .inv layout file types, which appear with a green check in front of their name.
Import a new plot
This ShapeFile (.shp) Import window lets you import a ShapeFile with the extension
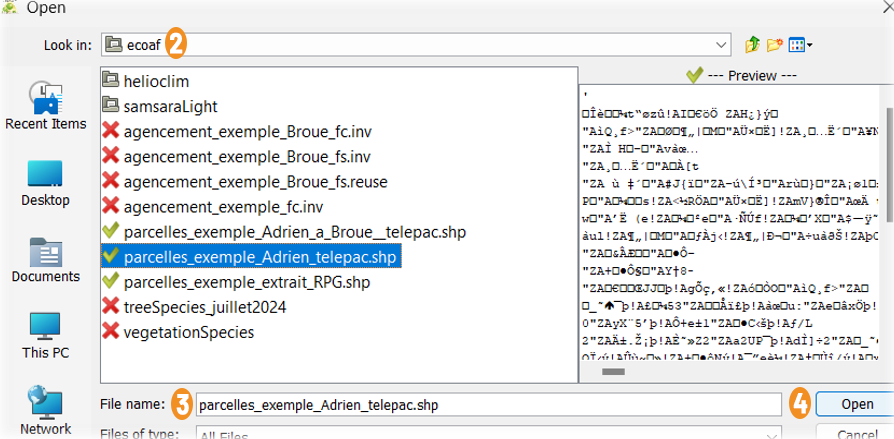
1 Click on Browse to select the parcel file .shp
2 In Look in, choose the folder where your file .shp is located
3 Choose the .shp file from the list. It will appear in File Name.
4 Click on Open
Info
seems in the note with a yellow background means that the plots are sometimes not real polygons. If a reading problem occurs, please email the file to frederique.santi [@] inrae.fr
5 Click on Import ShapeFile to save the layout file .inv
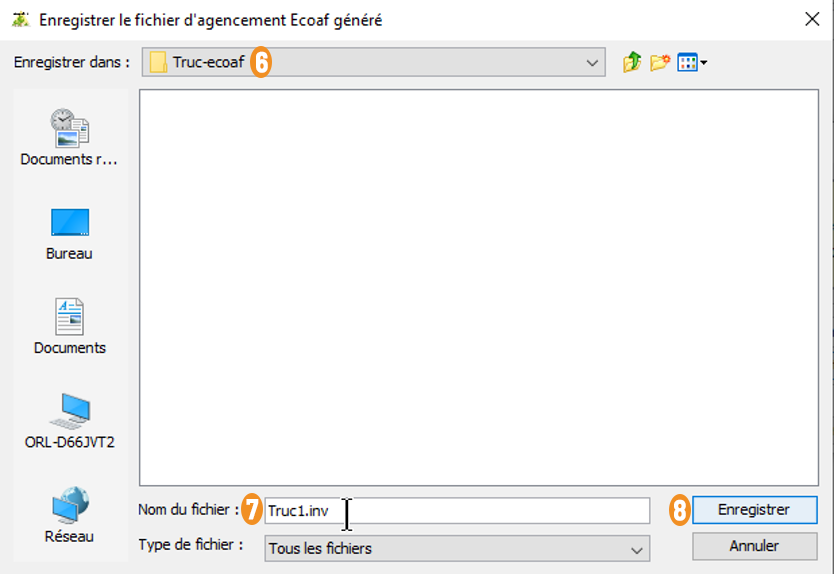
6 hoose Enregistrer dans working folder
7 In Nom du fichier, give a name Truc1.inv to the layout file, which for the moment will only contain information about the plot.
8 Click on Enregistrer
Warning
If you put Truc.shp in the Nom du fichier box, Truc.shp will be overwritten! You need to write the extension .inv, which means "inventory"; when Truc1.inv is used again in a future session, it appears with a green check (but sometimes it appears in red even though it is correct...).
9 Click on Close and copy the imported file name in the field "Ecoaf layout file"
The new layout file is displayed in Ecoaf layout file
10 Indicate the year in Simulation beginning year (yyyy). For example, 2024 means that planting will take place in the winter of 2024-2025.
11 Click on 3D Editor to start/modify a layout OR press on Finish initialisation to access the project without modifying the layout.


